
Overview of the "Workshop" Lessons Posted Below:

Art: Children will create decorated tiles using alcohol inks.
Photography: Children will participate in an outdoor scavenger hunt taking photographs of God's creation.
Computers: Children will explore the story using Awesome Bible Stories software.
Video: Children will watch the “Story of Creation” (The Great Bible Discovery Series.)
Music & Movement: Children will retell the story using scarves and dramatic movement.
Cooking:   Children will create Creation Snack Bags. (based on Seven Days of Creation Snack - Idea 1 posted here at Rotation.org

Scripture References:

Genesis 1 - 2:2
Memory Verse: “In the beginning, God created the heavens and the earth.”  Genesis 1:1

Theme:  God created the world and everything in it. We can learn about the character of God through the story of creation and thank God for the world he has given us to care for.


A Bible Background

People have always pondered the mystery of Creation. Why do I exist? What is the meaning of life?  How did the universe come into being? Children are especially full of questions. Why is the sky blue? Why did God make giraffes?  And a KEY question that nearly every child asks at some point.... If God made everything, who made God?  (Here’s a good answer for that question:  “Nobody.  That’s who God is – the One who started it all, the One who made you and me and everything! God just is. He has always been. He always will be.

We all have questions. We don’t always have answers. Questions will be a big part of this rotation of lessons. When teaching children, it may be tempting to try to explain away the wonders and mysteries of Creation or to give simple, pat answers…. Accept that we won’t have answers to all of our questions, for God is bigger than we and God’s ways are not our ways. Embrace the mystery! Celebrate the wonder!

What is Genesis? Is it history? Does it give an accurate account of the earliest age of the universe? It is myth?  Is this simply a symbolic story with little correspondence to real people, places and events? Perhaps we can best understand Genesis as writing of a different genre entirely. It is a PROCLAMATION of the love and majesty of God that through faith we experience through Creation. Rather than "how," the proclaimation helps us understand who God is, how God relates to his created order, and how we are to relate to God and the created order.

Like Creation itself, Genesis 1-2:2 is a Psalm of Awe, and a reminder of our place and role in God's universe.

As a United Methodist, I do not believe this Psalm of Awe opposes the modern scientific understanding of how the universe came to be, or how old it is. Genesis is poetry, not recipe. It is a Psalm, not court history. It is meant to move us and point us, rather than be dissected under an interpretative microscope. It is meant to remind us who is behind it all, and our role as stewards. Requiring Genesis to be read like history is like requiring Psalm 23 to be an actual story about a sheep, or a parable to have actually taken place. God's Word speaks through still small voices and mighty winds, stories about giants and whales, sinners and healing, death on a cross and an empty tomb. And God's Word speaks through scientific discovery -- to those with the ears and eyes of faith.

Themes in Genesis

The creation accounts in Genesis teach us about God.

  1. God is eternal – he has always existed. Before everything, there was God.
  2. God is in control -- God spoke and the universe came into being. God created all that is, seen and unseen. There was a definite beginning to the world. Before God spoke, the earth was formless and dark, a sort of cosmic emptiness.
  3. God is separate and distinct from his created order. This differs from Pantheism where God and the universe are one, where God is everything and everything is God.
  4. God is a personal God. He communicates. He is Sustainer as well as Creator. This contrasts with Deism, a belief system in which God creates, but then steps away and does not remain personally involved. (God does not wind up the world like a clock, set it in motion and then watch it wind down)
  5. God pays attention to detail. Think of the complexity and diversity of creation!
  6. God created humans in God’s image. We are the special objects of God’s love. We are heirs to all God has made. We are the center of his purpose, made to reflect God’s goodness, wisdom and love.
  7. God is purposeful. We live in a complex and ordered universe. There is purpose to our lives, as well.
  8. God’s creation is good. This differs from Gnosticism where only the spiritual component of life is good and the material and physical world is bad. Everything God made is good, therefore God himself must be VERY good!
  9. God created us to be stewards of the earth. We are responsible for caring for the earth, the plants, animals, air and water.

The Days of Creation

Rather than view these scientifically, or examine each day's meaning ad nauseum, it is better to view the days like strokes of paint being added to canvas to move us and remind us to whom we owe our life. The artist's purpose becomes clear on the 6th and 7th Days when a creature is made to enjoy fellowship with God and return his love by worshipping him and taking care of each other and the creation he has made.

Day One – Light and dark (day and night).
Day Two – Sky separated from the waters.
Day Three – Seas and dry land, plants and trees
Day Four – Sun, moon, stars
Day Five – Fish, sea creatures, birds
Day Six – Animals, man and woman
Day Seven – God rested

Last edited by Neil MacQueen
Original Post

Replies sorted oldest to newest

Creation

Art WorkshopAn alcohol inked tile

Summary:

Children will explore the uniqueness and beauty of creation as they decorate tiles using alcohol inks. These tiles could be used as a coaster if sealed. The result is a vivid reminder of God's beautiful creation.
Click on a photo to view in a larger size.

Scripture References:

Genesis 1-2:2

Memory Verse: "In the beginning, God created the heavens and the earth.”  Genesis 1:1

Lesson Objectives and Life Application:

Leader Preparation:

  • Review background information and lesson materials.
  • Gather necessary supplies.
  • Experiment with the alcohol inks and tiles. If you don’t like the pattern formed, you can use the blending solution to clean off the tile and begin again.
  • Write the memory verse on the board in the room.
  • Set out supplies.
  • Cover tables with old tablecloths to protect the table surfaces.


Supplies List:

  • 6-inch white/cream ceramic tiles (one per student)
  • Alcohol inks in a variety of colors (available at craft stores)
  • Alcohol ink blending solution
  • Felt blending pads or cotton swabs
  • Straws (one per student)
  • Stir sticks or toothpicks
  • Water-based sealer (suggest use a spray-from-a-can clear acrylic sealer)
  • Foam brushes
  • Paper towels
  • Large foam plates (one per student)
  • Pencils or permanent markers
  • The music video of the song: “God of Wonders,” by Third Day
  • A means of playing the music video on YouTube.


Lesson Plan

Opening

As students arrive, have this music video playing on a loop and invite them to watch it.

Clicking the following image opens the video in YouTube. Direct link: https://youtu.be/pJy2Pk5ewSI?si=2xKwoovZxOQkakrJ   The song was a mega-hit for the group "Third Day." It has also been recorded by other Christian artists.

God-of-Wonder-Video

  • Welcome students and explain what they will be doing and learning about today.
  • Ask them what their favorite parts of the video were -- and why. (How did it make you feel, etc.)
  • Ask "What did the video say about God?"  "About Creation?"


Introduce the Story

Say: This month we are talking about the story of Creation, and the beginning of the world.

Ask: Do you ever wonder why the sky is blue? What makes kittens so cuddly? Why dogs bark?

Say: In the beginning there were no blue skies, no cuddly kittens or barking dogs. In the beginning, there was nothing at all, nothing except one thing…. In the beginning there was God! And then God began to create. God spoke and out of nothing came the sun, the moon, the earth, the mountains, the valleys, the oceans, the fish, the birds, the plants, the animals and people. With love God created everything around us. Some people believe that the Creation story in the Bible is history that tells us exactly how God made the world. Some people believe that it’s not history but a story that shows how ancient people understood their world. Whether it’s history or not, the Creation story in the Bible teaches us some VERY important things about God and humans and the world, and that’s what we’ll be learning about today!

Ask: Do you know where we find the story of the “beginnings” of the world?

Say: We find it in the very beginning of the Bible! The first book of the Bible is called Genesis. Genesis means beginnings.

Let’s find it in our Bibles and read it together.

Questions after the reading:

  1. What was your favorite part of the story?
  2. What was created on the 6th day? (us)
  3. Why do you suppose we're listed 6th? (creation was made to be our home and gift from God)
  4. Was God "tired" on the 7th day? Why then did he rest?  Rest for what?  (To take it all in)
  5. What kinds of "rest" do you do on the Sabbath (Sunday) to think about your life and enjoy creation?


Create Alcohol Ink Painted Tiles As a Reminder to Think About Creation and Praise God

Introduce the Activity

Say:  We can learn about the nature of God from the story of Creation. One thing we learn is that God is VERY creative. Think about our world and all the amazing colors, creatures and life it contains. What an amazing and creative God to have thought and planned all of this. We learn that God created us in his image. This means we share some of the characteristics of God—we are NOT God, but we are creative like God. Today we are going to explore some unique creations using color.

Directions:

  1. Give each child a blank tile and a large foam plate as a work surface. Have them write their names on the back of the tile using pencil or permanent marker.alcohol inked tiles
  2. Squirt some alcohol blending solution onto the tile and show the children how to spread it evenly over the surface of the tile with the foam brush.
  3. Next squeeze some quarter-sized drops of ink on top of the tile.
  4. The color will blend and mix with the blending solution.
  5. Experiment by adding another color to a wet layer and watch the colors blend.      
  6. Letting the color dry and then adding another color will result in more distinct and bright color separation. (The ink dries really fast.)
  7. Try using a cotton swab or small square of felt (dipped in alcohol blending solution) to create a “smearing” or “streaking” effect.
  8. Or move the ink around with a toothpick.
  9. Or blow through a straw and watch the ink move and change (God "breathed" on us to give us life).


Do: As children work, be sure to note the amazing and unique colors and designs that are created. Discuss with the children…

Ask: What does it feel like to create something new?
How does it feel to watch the colors blend into new colors?
What do you think it would have been like for God when he “painted His Creation” with colors for the first time?

Note: If a tile should end up just as a muddy mess, you can start over by putting alcohol blending solution on the tile and wiping it off. (Be sure to watch the time though—children can start over so often that time will run out!)

Once children are satisfied with their design, have them ink the sides of the tile for a more finished look. Allow to dry! They dry quickly but, children will need to leave their tiles until the following week for pick up so that they can be sealed. (After class apply 3 thin coats of sealer allowing dry time between each layer.)

Reflection

  • Have your young artist share their tiles and explain what they see in their creation.
  • Close with a prayer thanking God for the gift of creation and being creators in his image!


Follow-up Tips:

From Jaymie Derden:
You can use alcohol inks on any smooth, slick surface. We've also used them on vellum paper and photo type paper.
For the tiles, you don't need to seal the tiles if they will simply be decorative and not be used as a coaster or trivet. You could always send home with the kids with a note to parents to seal if they decide to use the tiles.

Tips from Neil MacQueen:
The color material needs to be completely dry before applying sealer. Once I didn't wait long enough and the globs of paint underneath didn't dry once I sealed them.
If you don't seal the tile, whatever you've painted them with will FLAKE OFF if the tile is used.
Once sealed, you can also use the sharpie again to add a verse phrase.
Add felt tabs on the bottom of a sealed tile and you have a nice coaster.
I wanted to learn more about alcohol inks, so of course, YouTube to the rescue!

This particular video discusses the type of paper (though you can also paint on tinfoil and other things), methods of application and moving the inks around on the paper. I like that the result are MORE VIVID than the "old fashioned" way we used to blow watercolors with a straw.

This style of painting seems very expressive, which makes it perfect for certain Bible stories, or things you might want express in a more "impressionistic" style.


A lesson written by Jaymie Derden from State Street UMC, Bristol, VA and improved by the Rotation.org Content Team

Attachments

Images (3)
  • alcohol ink tile: Sample alcohol ink tile
  • alcohol ink: K-3 graders tiles
  • God-of-Wonder-Video
Last edited by Wormy the Helpful Worm

Creation Story Photo Scavenger Hunt Workshop

Creation-Scavenger-Hunt

Summary of Lesson Activities:

Children will participate in a Creation Scavenger Hunt with volunteers and their cellphones to photograph examples of things from each "day" of God’s Creation Story from Genesis 1:1-2:3.

Scripture References:

Genesis 1:1-2:2

Memory Verse:
Genesis 1:1


Leader Preparation:

  • Read the Background Information and lesson plan.
  • Gather necessary supplies for the lesson. Borrow several volunteers who have fully-charged cellphones.
  • Make copies of the scavenger hunt list.
  • Copy the scavenger hunt list and divide into several shorter lists.
  • Make sure you have the proper connecting cables so that you can view the photos on a large TV or monitor from the cellphones.

Supplies List:

  • List of scavenger hunt items – one copy for each child or team of children
  • Enough volunteers and their cellphones for 3 students per group.

    Update: Depending on the age of your students and circumstances, you may have a number of kids in your class who own their own cellphones. Check with their parents ahead of time and encourage them to bring them.

    Update 2: Give each "photographer" your email or phone number so they can SEND PHOTOS to you as they take them -- so that you or your techie can drag and drop them into a slideshow on your desktop. (Most laptops have a photo app that allows you to play photos in slideshow mode).


Lesson Plan

Opening:

Welcome all children and take their photos as they arrive. Start the lesson by explaining what they'll be doing and learning about today.

Introduce the Story:

Today’s story is about a Creator and the beginning of a creation. Who is our awesome Creator? (God) Since the very beginning of time, people looked into the night sky and wondered. They wondered about the moon, that bright object that changed shapes....sometimes round, sometimes just a little tiny sliver in the sky. They wondered about the rich, deep, darkness that stretched all around them, as far as they could see. They wondered about the tiny sparkling dots of light sprinkled in that velvety darkness. They wondered about it all.

What did it all mean? "And deep down inside themselves, in a quiet, still space, they knew—knew with all their hearts, and souls, and minds, that something more powerful than people was responsible for the velvety darkness, the softly glowing moon, and the glittering, shimmering stars."  (adapted from “My Life and Creation,” Exploring L.I.F.E., Joyce Brown, Cokesbury, The United Methodist Publishing House, 2004)

Do you ever wonder why the sky is blue? What makes kittens so cuddly? Why dogs bark?


Do you know where we find the story of the “beginnings” of the world?  We find it in the very beginning of the Bible! The first book of the Bible is called Genesis. Genesis means beginnings.

Let’s find it in our Bibles now and read the story.

Discussion

  1. What does Genesis mean?…. (beginning)
  2. Who created the earth and the universe?  (God)
  3. What did God create?  (heavens and earth, all things in it)
  4. WHY do you think God created the Universe and all of us?  (Was he lonely? bored? creative? joyful? inquisitive?)
  5. What is your favorite part of God's Creation?


Photo Scavenger Hunt

Say: Today we are going to focus on some of the wonderful things God created. We are going to go outside on a scavenger hunt – looking for things God created. Using various cellphones that our leaders have, when you find something on our list, you will take a photo of it and we'll view it when you come back.

You have 20 minutes max to photograph as many things on the list as you can!   

Adjust the time to suit your needs. If taking photos of "something that represents each day of Creation in scripture" they may need some extra help or time.


Review the Photos!

Quickly go through the photos on each cellphone, letting students shout out what item on the Scavenger List they think it is.  Don't keep score. Use this as a time of affirmation and awe, of point out how wonderful God's world is.

(Have each volunteer email you their photos so you can make a collage for display or a presentation on your church's social media)

Group Selfie and Prayer Closing:

Huddling in a circle to mimic the shape of the earth and all of us on it, take a group selfie!!   Then offer a prayer of thanksgiving, inviting each student to say aloud what they want to thank God for in creation.


Scavenger Hunt Items:

For older children, have them take their Bibles and snap a photo of 2 things from each day of Creation, or that represent what each day is about.  This is a richer activity because for certain "days" they will have to get creative about what to photograph. For example, how will they get a photo of oceans and fish? And how might they 'stage' or represent Day 7's day of rest?

For younger children, give them this simple of list of things to find "in" Creation:

  • Bird
  • Nest (bird or animal)
  • Squirrel
  • Chipmunk
  • Spider
  • Butterfly
  • Bee
  • Flower
  • A tree
  • Pine cone
  • Eggs or spider egg case
  • Sunshine, the sun
  • Something dark
  • Someone praying
  • Someone praising God
  • Someone taking care of one of God's creatures
  • Someone standing in awe of the beauty of Creation
  • Spider web
  • Seed or Nut
  • Something wet
  • Animal part (bone, feather, fur)
  • Grass
  • Weed
  • Something with a strong smell
  • Something under a rock
  • Something on wood
  • Sky
  • Cloud
  • Someone listening for God in creation
  • Dirt
  • Rock
  • Water (raindrop or other water)
  • Moon
  • Sun
  • Light
  • People
  • Dog/Cat


A lesson written by member Jaymie Derden and updated by a member of the Rotation.org Content Team

Attachments

Images (1)
  • Creation-Scavenger-Hunt
Last edited by Neil MacQueen

Creation

A Computer Software Lesson

Summary of Lesson Activities:

Children will explore the story through Awesome Bible Stories software.

View or Print the Creation Story Student Handout that guides students through the program. View or Print the Awesome Bible Stories Teaching Guide.

Note:  The lesson Jaymie originally posted here was very similar to one already posted here. You can also find a lesson plan by our Writing Team that uses The Creation Story found in the Awesome Bible Stories software.

Awesome Bible Stories software program is now available FREE OF CHARGE to download here at Rotation.org to the supporting members of Rotation.org.
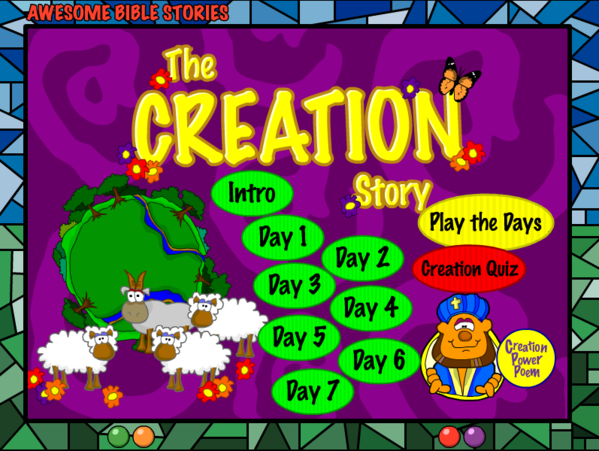
Learn more and download this free program!

Last edited by Neil MacQueen

Creation

Video Workshop

Summary of Lesson Activities:

Children will watch and discuss one or two short videos and then follow it up with their own dramatic reading of Genesis 1:1-2:2 and a "spinning" prayer of praise. For more video options, go to our Creation Story Video Workshop listings.

Option 1 for Younger Children and Preschool: When God Made The World -- video set to a reading of the popular children's book, When God Created the World. This poetic retelling features wonderful illustrations set to inspiring kid-friendly language. See it below.

Option 2: Saddleback Kids' Creation Story video
Video and illustrations narrated with scripture

Option 3: God's Story: Creation from Crossroads Kids
Quickly tells the story with life meaning.

This shortened version of Genesis 1 includes some nice commentary.

For older children and pre-teens:

Here's an excellent explanation of the themes, meaning, and importance of Genesis 1's story of Creation, our place and "rule" or role in Creation, and "The Image of God."  Use it for an alternative discussion with older kids.


Preparation and Room Set Up:

  • Read the Background information and Lesson.
  • Preview the YouTube videos in the classroom to be sure your internet connection is good.
  • Prepare popcorn and have it bagged and ready to distribute as children arrive.
  • Fill the pitcher with water from the hallway water fountain and fill cups.
  • Have the Video ready to go when the children arrive.

Supplies List:

  • Prepare to show the two videos on a large screen.
  • Popcorn


Lesson Plan

Opening:

As children arrive have them pick up their popcorn, season it as desired and sit in the theater seats. Welcome them and explain what they'll be viewing and doing today, and what you hope they will learn.


Introduce your video(s) with these warm-up questions and comments:


Let's take a quick "Creation Quiz"!

  1. When I say "Story of Creation" what do you think of?
  2. In what book is the Story of Creation found in the Bible?
  3. What does the word "Genesis" mean?
  4. Which do you think is more important, an explanation of HOW God created?  Or WHY God created? (explain your answer)

Say:  The Story of Creation in Genesis does not explain HOW God created the universe, only that God DID create it with the power of his Word, and made it with such beauty, color, and complexity that we stand IN AWE of God, as well as in AWE of what he made.

Perhaps the most important question about Creation, however, is WHAT are WE SUPPOSED TO BE DOING IN IT?

After viewing our video(s), I want you to try and answer that question.


VIEW YOUR VIDEO(S)

Debrief the Video:

If you had to explain the video to someone, what would you tell them it was about? 

READ GENESIS 1:1-2:2

If using your Bibles, assign verses to your students and demonstrate how to DRAMATICALLY READ a verse or two. If they aren't dramatic enough, interrupt them and encourage them to "make it BIG and POWERFUL, just like God did."

If you are reading for non-readers, be dramatic and invite them to "create with you" when you move your hands to place stars in the sky, and plant the ground, and make birds fly. (In other words, get your body into it!)

Close with a "twirling prayer game" inviting children to exhuberantly turn with their hands outstretched as they say something like "thank you God for the world and our place in it."  If possible, move this to the church lawn so that they have a soft landing if needed. Have each prayer go individually. If you have younger children, invite a strong adult to spin them in the air as they praise God for Creation.


A lesson originally posted by member Jaymie Derden and updated by the Rotation.org Content Team

Attachments

Images (1)
  • Spinning Prayer
Last edited by Neil MacQueen

Creation

A Music and Movement Workshop Lesson

Summary:

Children will dramatize the story of Creation using colorful color-coordinated streamers and a dramatic reading.

Scripture References:

Genesis 1-2:2, “The Story of Creation”

Memory Verse:

Genesis 1:1

Theme:

God created the world and everything in it.  We can learn about the character of God through the story of Creation, and the role God has given us to play in it.


Preparation and Room Set Up:

  • Read the Background information, Teaching Tips and Lesson.
  • Gather necessary supplies for the lesson.
  • Make scarves for dramatic movement.
  • Make streamers of each color:
    Cut or tear the colored fabric or crepe paper into strips, 12 inches long by 2 inches wide – four strips per color.
    Stack the strips on top of each other and tie in the middle with yarn (fabric) or tape (crepe paper).
  • Tip: Leave some of the streams incomplete so children can help complete them as they arrive.
  • Stack the streamers in piles according to their color.


Supplies List:

  • 3/4 yard each of black, yellow, dark blue, light blue, red, pink, white, brown, green fabric or use crepe paper strips
  • clear tape or yarn


Lesson Plan

Opening:

Greet the children as they arrive and immediately involve them in attaching more fabric and crepe paper to the streamers you prepared ahead of time.


Introduce the Story:

Warmup Questions:  Why do you think the grass is green and water is blue? Do you ever look up at the stars and wonder how they got there?  Have you ever wondered if your life matters -- or are you just a small unimportant part of the universe?

There's a story in the Bible that teaches us WHERE ALL THIS came from, including YOU. And more important, WHY IT AND YOU are here! 

Do you know the name of that story? Do you know where in the Bible we can find it? Let's look!


Help the children locate “The Story of Creation,” Genesis 1-2:2 and read it as a group.

Depending on your age group, randomly point to a reader to have them read 3 verses each. (Randomly assigning readers makes everyone focus in case it will be their turn.)

Discussion Questions:

Genesis means…. (beginning)

Who created the earth and the universe?  (God)

What did God create?  (heavens and earth, all things in it)

WHY did God create Creation?   (the answer is in Day 7: God wanted to enjoy it, rest in it)

What does the Creation Story tell us about God's personality? character?   ---God is creative, orderly, patient, takes care, and is full of joy (have you ever seen a monkey or giraffe?)   All of these together show a loving God.


What does it mean to be made in God’s image?  (we are creative, orderly, and can be patient, take care, and be full of joy!)

When you hear or read the Story of Creation, do you get the feeling that God is...
BORING? or FULL OF JOY?
CALM or EXHUBERANT?
DULL or FULL OF LIFE?


Colorful Creation Movement

(We adapted this activity from the script from Exploring L.I.F.E., My Life and Creation, Joyce Brown, Cokesbury, 2004. BUT you could easily use this activity by using a Children's Story Bible -- read the story of creation and have children use the streamers OR use the Gerald McDermott book Creation -- this is a beautiful retelling of the Creation story with descriptive words that can easily be demonstrated with actions.

Directions:

  1. Say:  God’s creation is full of colors. We are going to re-tell the story of Creation using these colorful streamers, our body motions and the expressions on our faces only. We will start out with just one or two volunteers, but before the story is done, everyone will join in.

General Directions:

  1. Have children sit in rows, far enough apart that they can stretch out their arms without touching their neighbors on the sides or front/back.
  2. Before beginning, show children the color streamers previously prepared. Have them think about the different colors in creation and determine which colors fit -- for example: darkness - black, light - yellow, stars/moon - white, earth - brown, plants, grass - green (and other colors), animals and birds (all colors), sky - light blue, water - dark blue, etc.
  3. Pass out colored streamers to the children so all colors are distributed and each child has at least one streamer. There are nine colors, so base the number you pass out on the number of children in your class. If you have a large class, you’ll need to have multiple children take one color of wrist scarves. If you have less than nine in class, children will have to use two different colors (a different color on each hand). Just be sure every child will have an opportunity to participate.
  4. Next have children practice some motions and expressions to warm up and get the feel for the movement with the streamers. Use some of the following words as examples. Remind them to use just face and your body... no words!. Determine a "stop" signal -- such as raising your hands.

Swirling….

Hovering…

Suddenly…

Shimmering…

Sparkling...

Rushing...

Swimming...

Soaring...

Flapping...

Floating...

High….

Low…

Hiding…

Bursting…

Smelly…

Strong…

Weak…

5. Read the story (from the script, the story Bible or the Creation book), pausing to let the children use the streamers, body movements and facial expressions to act out the narration -- For example: in the beginning there was only darkness (black streamers) -- The children with the black streamers should act out the words -- such as floating, hovering, nothingness. When you add the light -- the children with the yellow streamers will act. Read slowly and pause after colors, descriptions or motions are mentioned.


Reflection:

Write some of the keywords from today's lesson and celebration on the streamers so that the students can take them home. With older kids, have them write a message of thanksgiving for God's Creation.

For your closing, have student share some of the words they wrote as a prayer to God.


A lesson written by Jaymie Derden from: State Street UMC, Bristol, VA
and updated by a member of the Rotation.org Content Team

Attachments

Images (1)
  • Creation Streamers
Last edited by Neil MacQueen

@Jaymie Derden, (and @Cindy Merten, I think you did this workshop also?),

I am looking at the lovely alcohol inks tile art workshop above. A few questions: 

  • Did you have a lot of different ink colors for the kids to choose from? Or was that too many choices and everyone wanted the same color at the same time? 
  • I imagine you would want to have enough ink bottles so that there are two or three per person, even though they are sharing and passing around the bottles? Or if you have  8 kids, is 8 bottles of ink enough?
  • How long do the tiles take to dry (before you put on the sealer)? Is it possible for the kids to write the memory verse on their tiles once they are done with the ink part? Or would that be too much mess or not enough drying time? (we have 50 total for class)


Thanks!

HI Amy... we did this several years ago, so I'm having to really think back. 

We did have a lot of different inks. I found them on sale and stocked up (they can be a bit pricey.) We did talk about not using so many colors that everything got muddy, but if that happens, you just wipe the tile clean with alcohol before it totally dries. We did have to watch it though as there are always those few perfectionists who want to erase and do over and over and over again. It's easy for kids to share the bottles, as they only add a few drops at a time, so you COULD manage with 8 bottles for 8 kids, though I would probably do 10-12. 

I've been asked about drying time before and honestly I don't remember. I am pretty sure we let them sit and then spray sealed them with water-based sealer before the next week for the kids to pick up. I think you could write on the painted tile with a permanent (alcohol based) marker, but I'm not sure you could do it in the same class period. I don't think it would be dry enough for that. 

There are bunches of youtube tutorials about using alcohol inks. Here's one that includes doodling with black pens afterward. I think she lets it sit overnight before adding the doodling: 

Doodling with alcohol inks

I also saw a comment someone made that they stamped onto the tile after it was dry, using a stayz-on ink pad. Maybe you could find or stamp a key word or phrase rather than the entire verse?

The kids LOVED doing this and the results were really stunning. 

Enjoy!

Jaymie


Add Reply

Post a New Topic
Lesson or Resource
Rotation.org Inc. is a volunteer-run, 100% member supported, 501(c)3 non-profit Sunday School lesson ministry. You are welcome to borrow and adapt content for non-commercial teaching purposes --as long as both the site and author are referenced. Rotation.org Inc reserves the right to manage, move, condense, delete, and otherwise improve all content posted to the site. Read our Terms of Service. Get a free Registered Membership or become a Supporting Member for full access to all site resources.
Rotation.org is rated 5 stars on Google based on 51 reviews. Serving a global community including the United States, Canada, United Kingdom, Australia, New Zealand, S. Africa, and more!
×
×
×
×
Link copied to your clipboard.
×
×